Running Apache Spark and Jupiter Notebooks on Kubernetes with Helm Charts
There are various ways to deploy and run Apache Spark but undoubtedly one of the easiest one is to use Kubernetes.
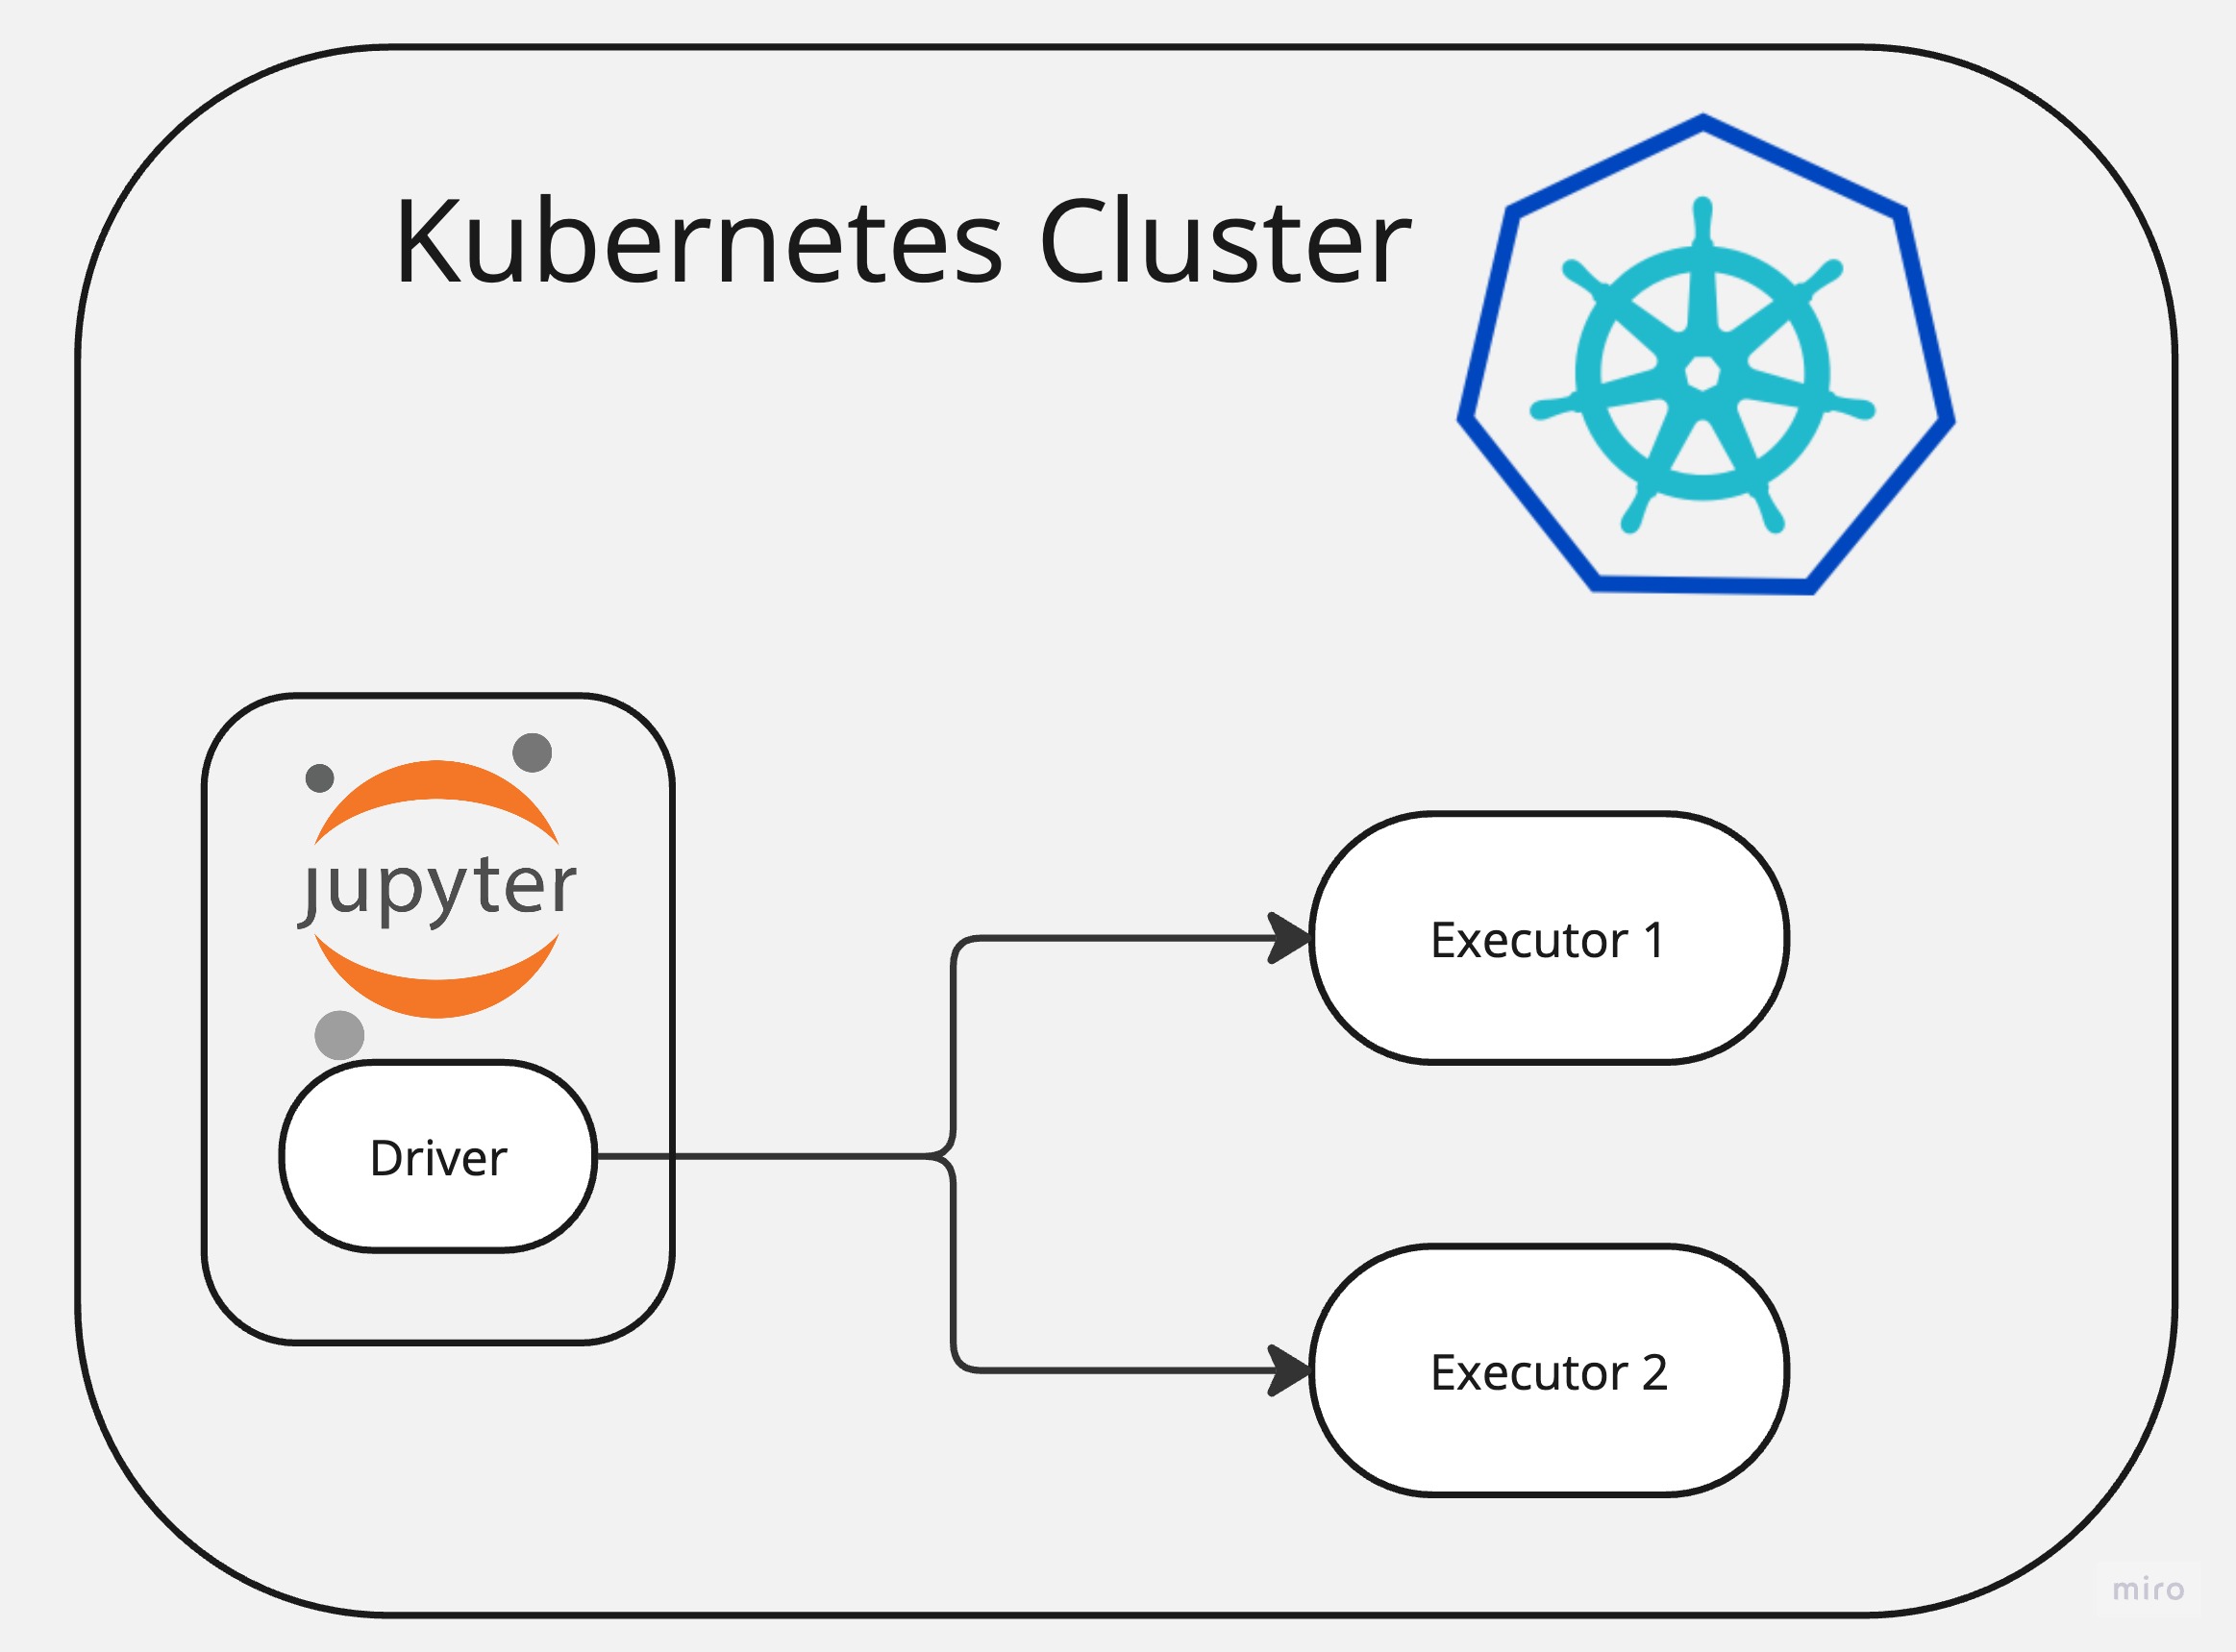
In this article I will show how it’s easy to deploy Apache Spark and Jupiter Notebook to Kubernetes environment and start doing data analysis straightaway.
Requirements
You will need running Kubernetes cluster or just use local cluster.
- minikube
- helm
Setup Apache Spark
This is by all means the easiest way I have ever installed Spark.
Once you have your Helm tool installed locally run below command to download and install Spark using Helm Chart from Bitnami.
helm install my-release oci://registry-1.docker.io/bitnamicharts/spark
This command will deploy a Spark cluster with 3 nodes, Master and 2 Worker nodes.
Check deployment
kubectl get pods
NAME                              READY   STATUS    RESTARTS      AGE
my-release-spark-master-0         1/1     Running   0 (1m ago)    1m
my-release-spark-worker-0         1/1     Running   0 (1m ago)    1m
my-release-spark-worker-1         1/1     Running   0 (1m ago)    1m
Deploy Jupiter Hub
For this task I am using official Jupiter Hub images but I will pack them to a Kubernetes Deployment so I can install it easily.
Below is complete YAML file. It defines Deployment for Jupiter Hub and two Services. One for web interface, so we can connect to it and one (headless) for internal pod to pod communication.
jupiter.yaml
apiVersion: apps/v1
kind: Deployment
metadata:
   name: jupiter-spark
   namespace: default
spec:
   replicas: 1
   selector:
      matchLabels:
         app: spark
   template:
      metadata:
         labels:
            app: spark
      spec:
         containers:
            - name: jupiter-spark-container
              image: quay.io/jupyter/all-spark-notebook
              imagePullPolicy: IfNotPresent
---
apiVersion: v1
kind: Service
metadata:
   name: jupiter-spark-svc
   namespace: default
spec:
   type: NodePort
   selector:
      app: spark
   ports:
      - port: 8888
        targetPort: 8888
        nodePort: 30001
---
apiVersion: v1
kind: Service
metadata:
  name: jupiter-spark-driver-headless
spec:
  clusterIP: None
  selector:
    app: spark
Apply the yaml:
kubetctl apply -f jupiter.yaml
check the installation
kubectl get pods

NAME                              READY   STATUS    RESTARTS     AGE
jupiter-spark-6c8756c5f9-81ei4    1/1     Running   1 (1h ago)   5m
my-release-spark-master-0         1/1     Running   1 (1m ago)   5min
my-release-spark-worker-0         1/1     Running   1 (1m ago)   5min
my-release-spark-worker-1         1/1     Running   1 (1m ago)   5min
Connect to Spark from Jupiter Notebook
All set for this step and we just need to connect to Jupiter server running on a pod. Since it’s running on a pod then we need to expose it, so we can connect.
Let’s run below command for it:
kubectl port-forward service/jupiter-spark-svc 7080:8888

# If you are running on a specific host and IP
# kubectl port-forward service/jupiter-spark-svc 7080:8888 --address 192.168.1.180
Now we can open Jupiter Hub on a browser:
http://localhost:7080/lab
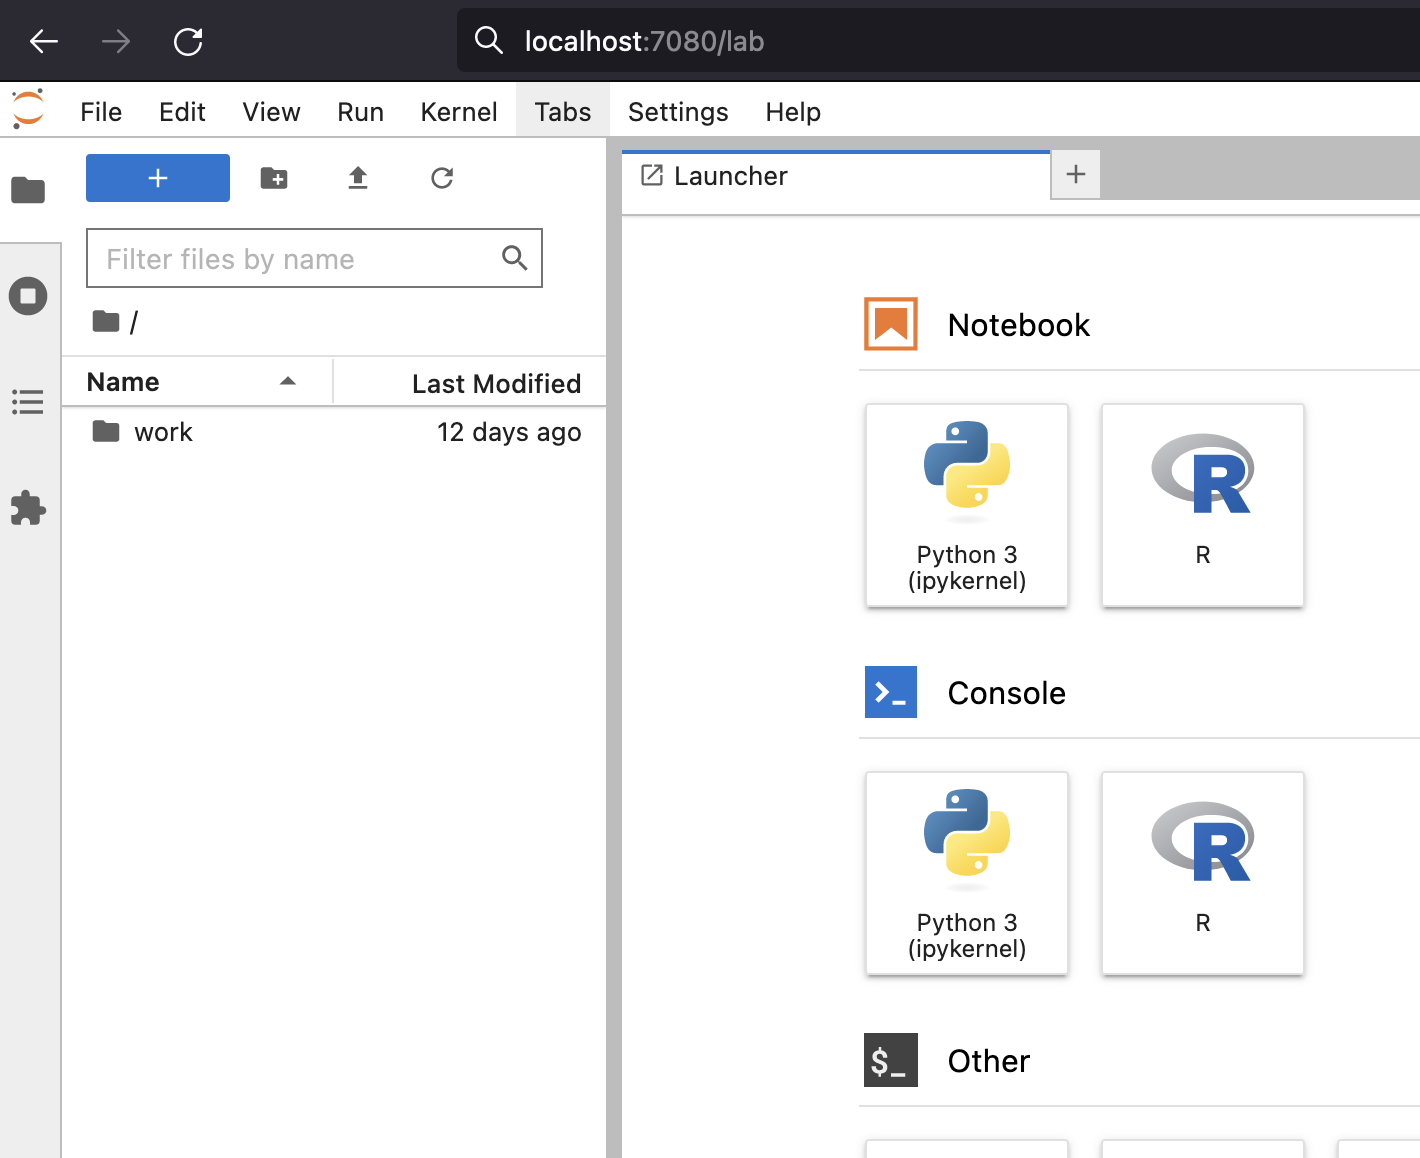
Connect and run some Spark code
Lets connect to cluster from Jupiter and run some Spark code.
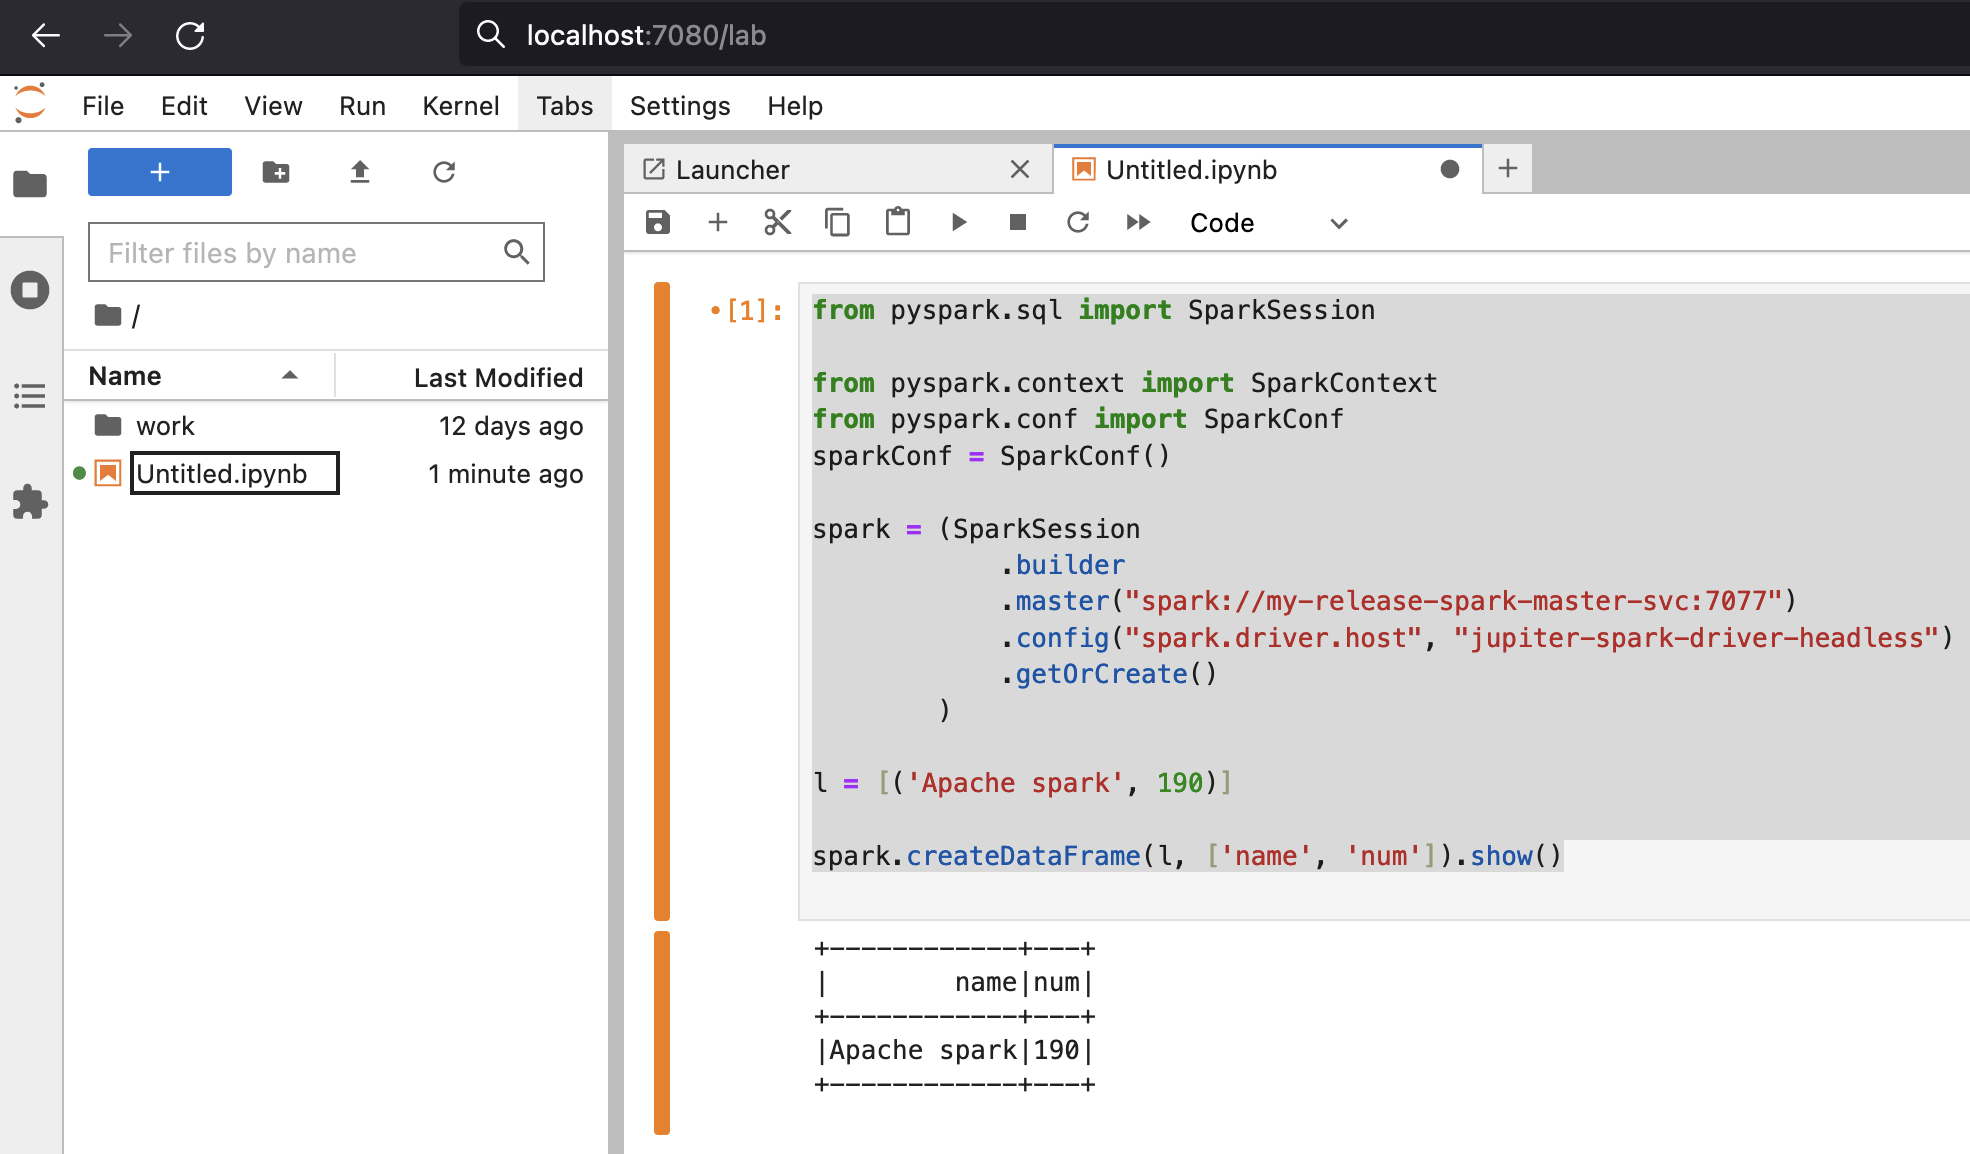
Below is sample code:
from pyspark.sql import SparkSession

from pyspark.context import SparkContext
from pyspark.conf import SparkConf
sparkConf = SparkConf()

spark = (SparkSession
            .builder
            .master("spark://my-release-spark-master-svc:7077")
            .config("spark.driver.host", "jupiter-spark-driver-headless")
            .getOrCreate()
        )

l = [('Apache spark', 190)]

spark.createDataFrame(l, ['name', 'num']).show()
you should get output like below:
Scaling Spark cluster
Scaling cluster with Kubernetes and Helm is very easy.
Just set desired replica count and upgrade the release:
helm upgrade --set worker.replicaCount=3 my-release oci://registry-1.docker.io/bitnamicharts/spark
Check
kubectl get pods
NAME                              READY   STATUS    RESTARTS     AGE
jupiter-spark-6c8756c5f9-81ei4    1/1     Running   1 (10h ago)  29h
my-release-spark-master-0         1/1     Running   1 (1m ago)   1h
my-release-spark-worker-0         1/1     Running   1 (1m ago)   1h
my-release-spark-worker-1         1/1     Running   1 (1m ago)   1h
my-release-spark-worker-2         1/1     Running   1 (1m ago)   1h
Conclusion
Intention of this article was to show how it’s easy to get started with Spark and start running analytics on Spark cluster.
References
https://bitnami.com/stack/spark/helm
https://github.com/bitnami/charts/tree/main/bitnami/spark/#installing-the-chart
https://jupyter-docker-stacks.readthedocs.io/en/latest/using/selecting.html
https://hub.docker.com/r/bitnami/spark
https://github.com/bitnami/containers/blob/main/bitnami/spark/3.5/debian-11/Dockerfile